SvelteKit, Docker, and Umami: A Winning Combination for Web Analytics
Discover how to harness the power of Umami, a comprehensive web analytics platform, using Docker in conjunction with your SvelteKit app, gaining unparalleled insights into user behavior and website performance.
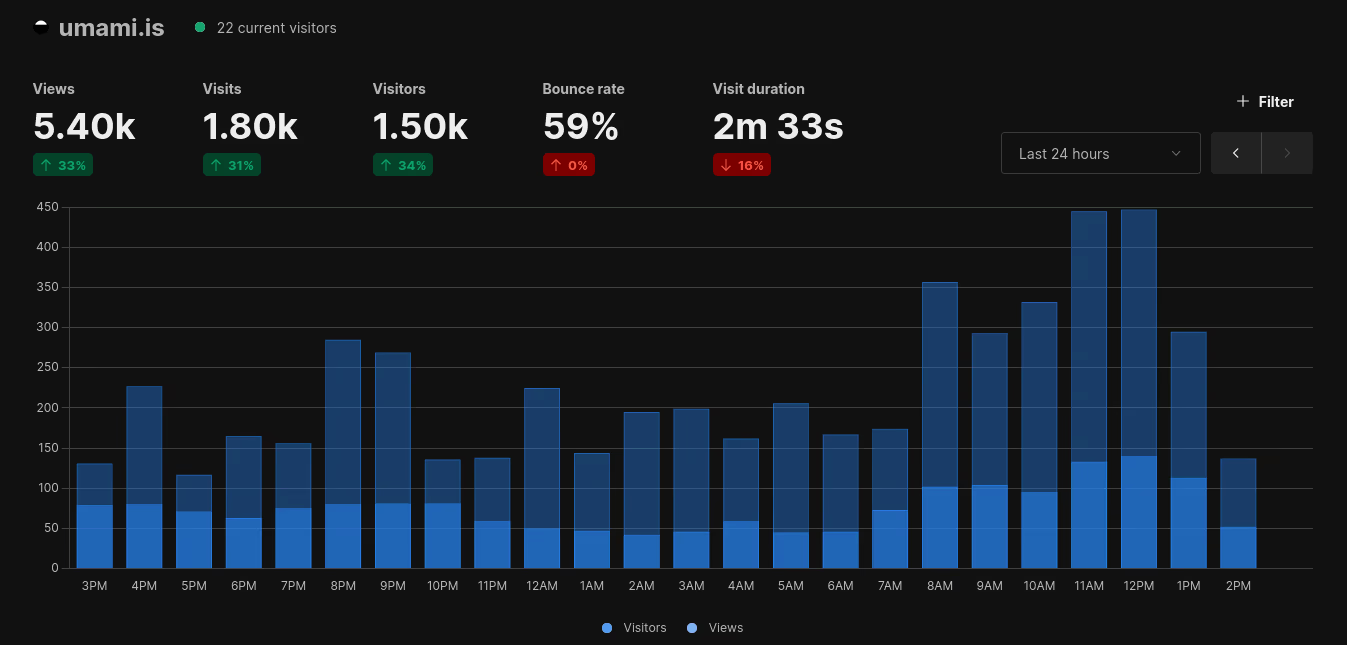
As a developer building a SvelteKit application, you're likely eager to understand how users interact with your website or app. Web analytics tools provide valuable insights into user behavior, helping you refine your product and improve the overall user experience.
However, setting up web analytics can be a daunting task, especially when it comes to integrating multiple services. In this guide, we'll walk you through the process of installing Umami, a powerful web analytics platform, using Docker, and then integrate it with your SvelteKit app. With this setup, you'll gain a deeper understanding of user behavior and website performance, empowering you to make data-driven decisions for your application.
What is Umami
Ummai is an open-source, self-hosted web analytics platform that allows you to collect and visualize data about your website or application's traffic, engagement, and behavior. Unlike traditional analytics tools like Google Analytics, which rely on third-party tracking scripts and store user data in the cloud, Umami stores all of its data locally on your own server. This provides greater control over your data, as well as a higher level of security and transparency. With Umami, you can track page views, unique visitors, bounce rates, and other key metrics, giving you a more nuanced understanding of how users interact with your site.
Exploring the Features
Before we dive into installing Umami on Docker, you might be curious about what it's like to use in action. The Umami website offers a live demo where you can explore its features and get a sense of how it works. We encourage you to try it out – simply navigate to the demo page, log in with a test account, and start exploring the dashboard. With this hands-on experience under your belt, you'll be better equipped to follow along as we guide you through installing Umami on Docker.
Installation
Now that you're familiar with what Umami offers, it's time to get started with installing your own instance. The easiest way to do this is by using Docker Compose, a tool for defining and running multi-container Docker applications. With Docker Compose, you can spin up an Umami instance with just a few commands.
To get started, create a new file named docker-compose.yml in the root of your project directory with the following contents
(you can check it on github):
version: '3'
services:
  umami:
    image: ghcr.io/umami-software/umami:postgresql-latest
    ports:
      - "3000:3000"
    environment:
      DATABASE_URL: postgresql://umami:umami@db:5432/umami
      DATABASE_TYPE: postgresql
     APP_SECRET: replace-me-with-a-random-string
    depends_on:
      db:
        condition: service_healthy
    init: true
    restart: always
    healthcheck:
      test: ["CMD-SHELL", "curl http://localhost:3000/api/heartbeat"]
      interval: 5s
      timeout: 5s
      retries: 5
  db:
    image: postgres:15-alpine
    environment:
      POSTGRES_DB: umami
      POSTGRES_USER: umami
      POSTGRES_PASSWORD: umami
    volumes:
      - umami-db-data:/var/lib/postgresql/data
    restart: always
    healthcheck:
      test: ["CMD-SHELL", "pg_isready -U $${POSTGRES_USER} -d $${POSTGRES_DB}"]
      interval: 5s
      timeout: 5s
      retries: 5
volumes:
  umami-db-data:
This Docker Compose file defines two services: db and umami. The db service uses the official
Postgres image, while the umami service uses the official Umami image with PostgreSQL support.
Make sure to replace the highlighted parts with a more secure strings.
To run your Umami instance, navigate to the project root and execute the following command:
docker compose up -d
This will start both services in detached mode. Your Umami instance is now running on port 3000!
Open a web browser and navigate to http://localhost:3000 to access the dashboard.
Note that this setup uses a volume for persistent data storage, so your database will persist even after you stop the container.
Configuring Umami
Now that you have Umami up and running, it's time to configure it for your needs. By default, Umami comes with a basic setup, but you can customize many aspects of the platform to suit your requirements.
Next, navigate to the Umami dashboard by visiting http://localhost:3000 in your web browser. Log in using the
default credentials (admin for username and umami for password), then change the password immediately to ensure security.
Adding a new website
-
Log in to your account: Ensure you're logged into your Umami account
-
Navigate to the Website options: Click on the top menu and select the Settings tab
-
Click Add Website: In the settings panel, click the Add Website button to proceed with adding your site details
-
Fill in the required fields: - Provide a name for your website (choose whatever you want) - Enter the Domain URL of the site you want to connect the analytics to (e.g., example.com)
-
Get the tracking code: - Click the Edit button - Copy the Website ID code
Adding Umami to Sveltekit
To integrate Umami with your SvelteKit project, we'll create a custom component and store to handle
tracking codes instead of using the default script tag provided by Umami. This approach offers
more flexibility and control over how you manage analytics in your application.
By creating a reusable <Umami/> component and a corresponding umamiStore, we can easily
inject the tracking code into our SvelteKit pages without cluttering our markup with unnecessary
HTML tags. This design choice also allows for easier maintenance and updates to your Umami configuration.
Umami Store
To manage the state of your Umami instance, we'll create a umamiStore using Svelte's built-in store system.
The store will keep track of two essential properties: whether analytics are enabled and the current status of the tracking code.
import { writable } from 'svelte/store';

const lastStatus: boolean =
	typeof localStorage !== 'undefined'
		? JSON.parse(localStorage.getItem('umami') || '{"enabled": true}').enabled
		: true;

export const isEnabled = writable<boolean>(lastStatus);

isEnabled.subscribe((value) => {
	if (typeof localStorage !== 'undefined') {
		localStorage.setItem('umami', JSON.stringify({ enabled: value }));
	}
});

export const status = writable<undefined | 'mounted' | 'removed' | 'loaded' | 'error'>(undefined);
This store allows you to easily display a privacy modal or error message to the user based on the
current status of the tracking code. For example, when analytics are activated, you can show a
reminder about data collection, while an error status can trigger a notification about a tracking
issue. This way, you can provide a seamless user experience and maintain transparency about how
your app handles data.
Umami Component
To integrate Umami into your SvelteKit application, we'll create a custom <Umami/> component.
This component will handle the loading and initialization of the tracking code, as well as
updating the status store to reflect changes in the tracking code's state.
The component uses Svelte's built-in lifecycle methods (onMount and onDestroy) to manage the script's
insertion and removal from the DOM, ensuring that it only loads when necessary. When the script
is loaded, the component updates the status store with a loaded status, indicating that tracking has begun.
The component also includes error handling, which sets the status store to an error status when any issues
occur during loading. This allows you to display a notification or alert the user about the issue.
Finally, the component conditionally loads the Umami script only in browser environments and when analytics are enabled, ensuring that it doesn't load unnecessarily.
<script context="module" lang="ts">
	import { status } from '$lib/stores/umami.svelte';
	status.set(undefined);
	declare let window: WindowWithUmami;
</script>

<script lang="ts">
	import { BROWSER } from 'esm-env';
	import { onDestroy, onMount } from 'svelte';

	import { dev } from '$app/environment';
	import type { WindowWithUmami } from '$types/umami';

	export let websiteID: string;
	export let srcURL: string;

	onMount(() => {
		if (
			BROWSER &&
			document.getElementById('umami_analytics_script') !== null &&
			$status !== 'loaded'
		) {
			$status = 'mounted';
		}
	});

	onDestroy(() => {
		if (BROWSER) {
			const script = document.getElementById('umami_analytics_script');
			if (script !== null) {
				script.remove();
				$status = 'removed';
				window.umami = undefined;
			}
		}
	});

	let shouldInitialize = [undefined, 'removed', 'error'].includes($status);

	function scriptLoaded() {
		$status = 'loaded';
	}

	function errorHappened() {
		$status = 'error';
	}
</script>

<svelte:head>
	{#if shouldInitialize && !dev}
		<script
			async
			defer
			id="umami_analytics_script"
			data-testid="umami_analytics_script"
			src={srcURL}
			data-website-id={websiteID}
			on:load={scriptLoaded}
			on:error={errorHappened}
		></script>
	{/if}
</svelte:head>
export interface WindowWithUmami extends Window {
	umami: unknown | undefined;
}
Use component in the root layout
To complete the integration, navigate to your +layout.svelte file (usually located at the root of
your project) and add the <Umami/> component. The component
expects two props: websiteID and srcURL, which should be passed in from your app's configuration or env.
websiteID: is the unique identifier of your Umami instance, which was saved during the Umami settings processsrcURL: is the URL where your Umami instance lives
<script lang="ts">
	import { Umami } from '$components/shared/misc';
	import { env } from '$env/dynamic/public';

	let { children } = $props();
</script>

<Umami websiteID={env.PUBLIC_UMAMI_WEBSITE_ID} srcURL={env.PUBLIC_UMAMI_SERVER_REMOTE} />
Conclusion
With this integration complete, you'll have a seamless way to monitor user behavior on your SvelteKit application, providing valuable insights to inform future development decisions. By leveraging the power of Umami's open-source analytics platform, you can maintain transparency with your users while gaining a deeper understanding of their interactions with your site.
No comments yet. Be the first.